• Home
  • Chainsaw Chains
  • Chainsaw Guide Bars
  • Garden Machinery
  • Brands
  • Accessories
  • About Us
  • Contact Us
  • Guides & Helpful Information
    • General Help and Information
    • How To Guides
  • Videos
  • Delivery Policy
Basket user phone
Premium Sawchain
 
Premium Sawchain
  • My AccountAccount Login
  • My AccountYour basket is empty

My Settings – Select your browsing options below:

  • Home
  • About Us
  • Contact Us
  • Guides & Helpful Information
  • Videos
  • Delivery Policy
  • Click to Search
Tel: +44(0)28 9433 4444
  • Chainsaw Chains
  • Chainsaw Guide Bars
  • Garden Machinery
    • Chainsaws
  • Brands
    • ACTIVE
    • AEG
    • Aldi
    • ALKO
    • ALPINA
    • BELL
    • BERNARD
    • BLACK & DECKER
    • BLITZ
    • BOSCH
    • BULLCRAFT
    • CAMPAGNOLA
    • CASTEL
    • CASTOR
    • Challenge
    • CHALLENGE XTREME
    • CRAFTSMAN
    • CUB CADET
    • View All Brands
  • Accessories
    • PowerSharp
    • Chainsaw Accessories
    • Chain Making Tools
    • Chainsaw Safety Wear
    • Chainsaw Oils
    • Sharpening Tools & Accessories
    • Chainsaw Chain Bulk Rolls
    • Trimmer Lines

21

Mar
2014

We have put together a quick photo guide to assembling the Yukon combi hat.
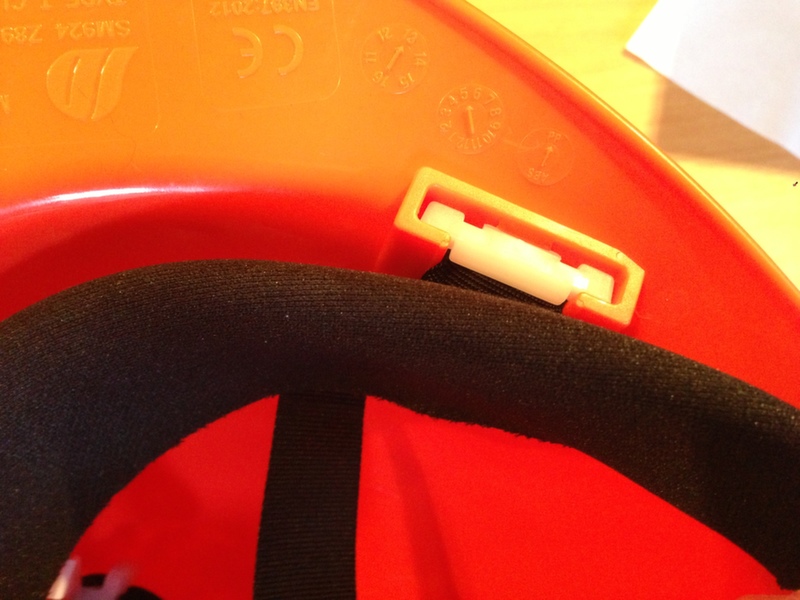
Step 1:

Insert the ends of the head straps into slots 902 of the head band. This is done by pushing the plastic keeper through the slot and then twisting 90 degrees. These should run diagonally from corner to corner
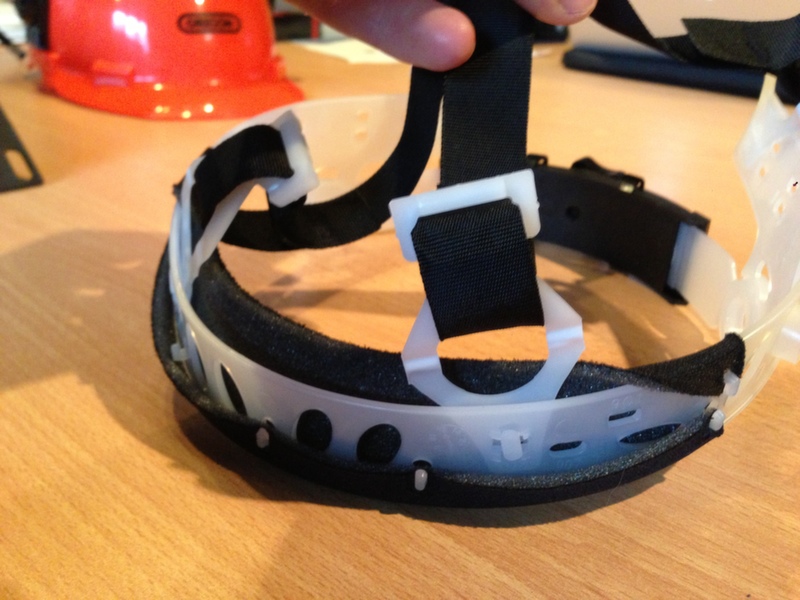
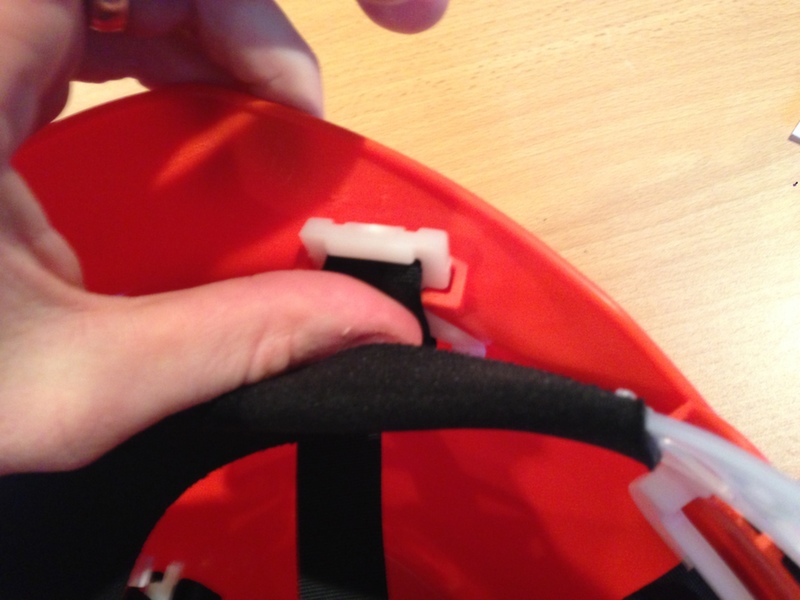
 

Step 2:

Insert the third head strap firmly into the slots at each side of the helmet.
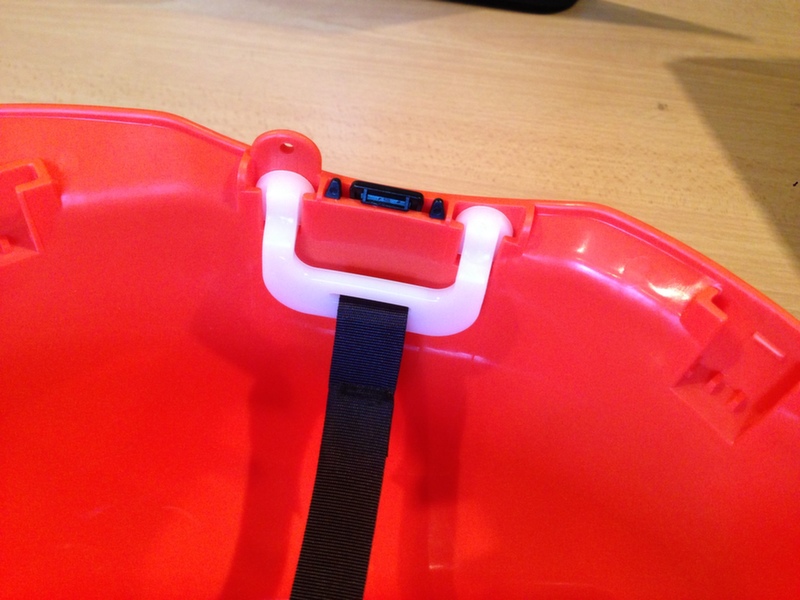
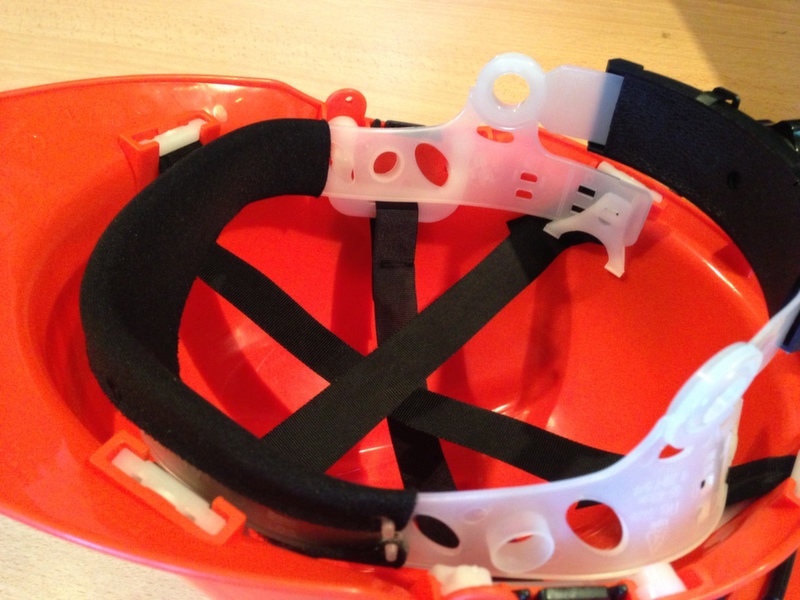
 Step 3:

Take the head band with the straps attached. This needs to be inserted into the main helmet body with the foam padding to the front and the adjuster knob to the rear. Fold the plastic end of the strap over and push the clip down into the slot in the helmet. Repeat this for all four corners.


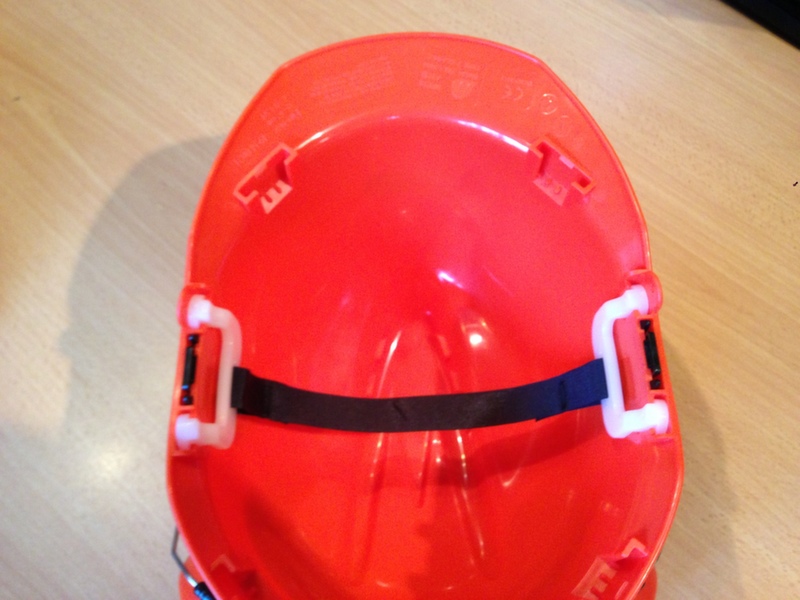
It should look like this when all is in place.
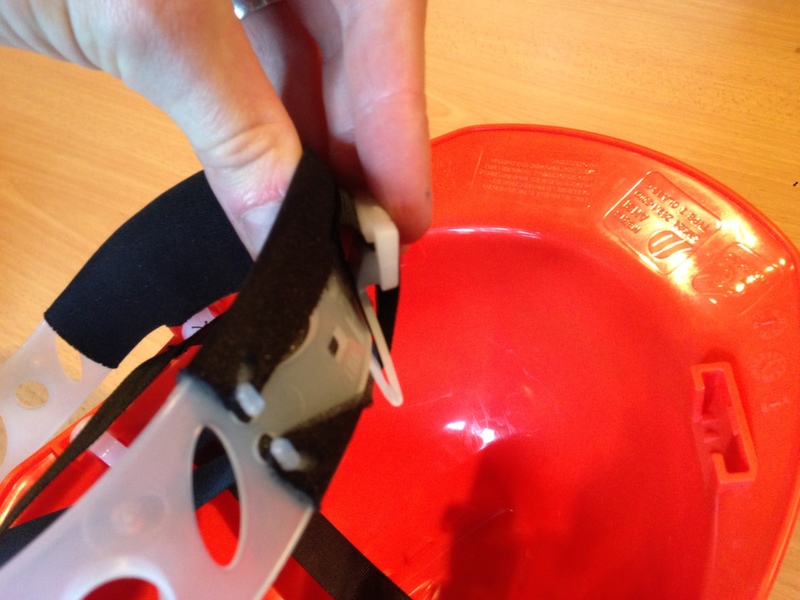
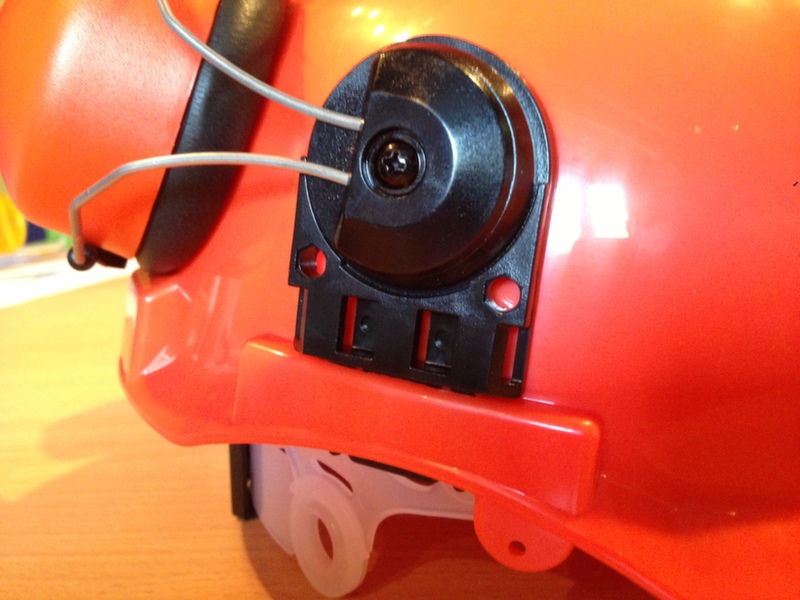
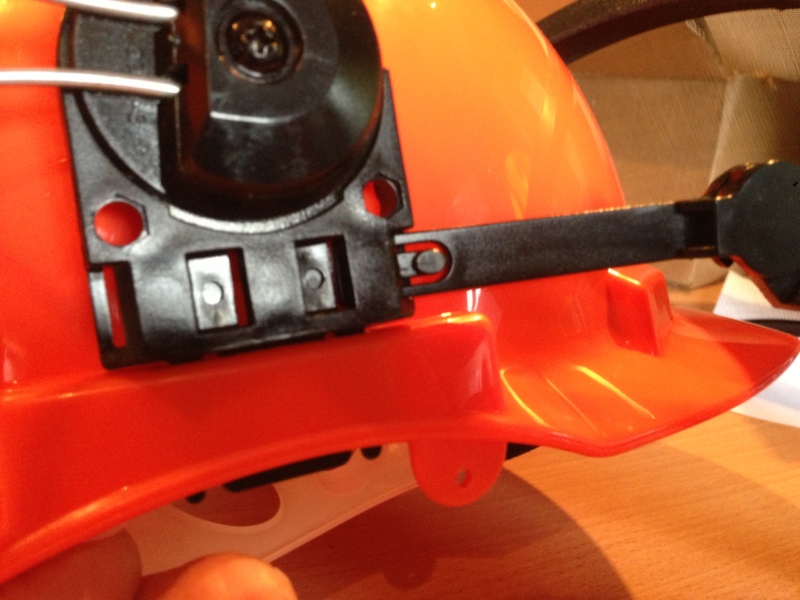
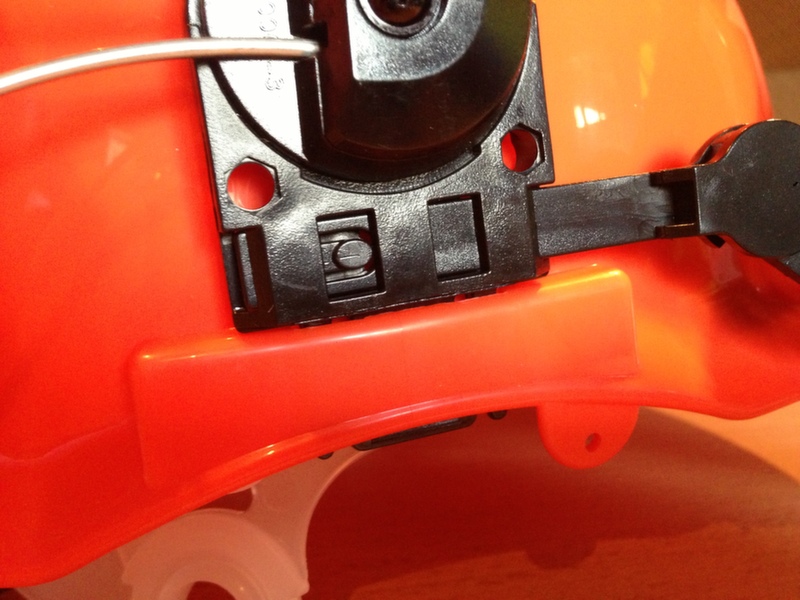
Step 4:

Now click the ear defenders into the slot on the outside of the helmet body. These are not sided so can go on either side.
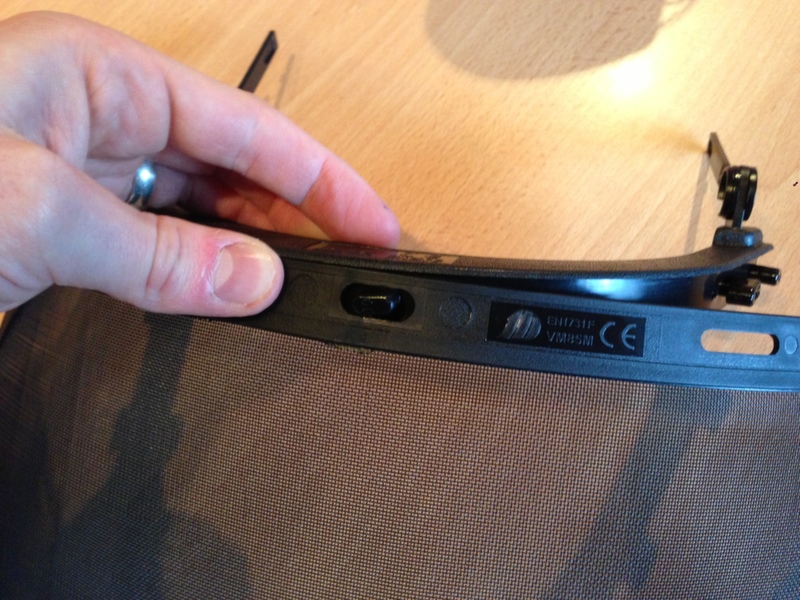
Step 5:

Attach the visor to the rim by pushing the catch through the slot and then twisting it 90 degrees. Start with the middle and then work to the outsides.
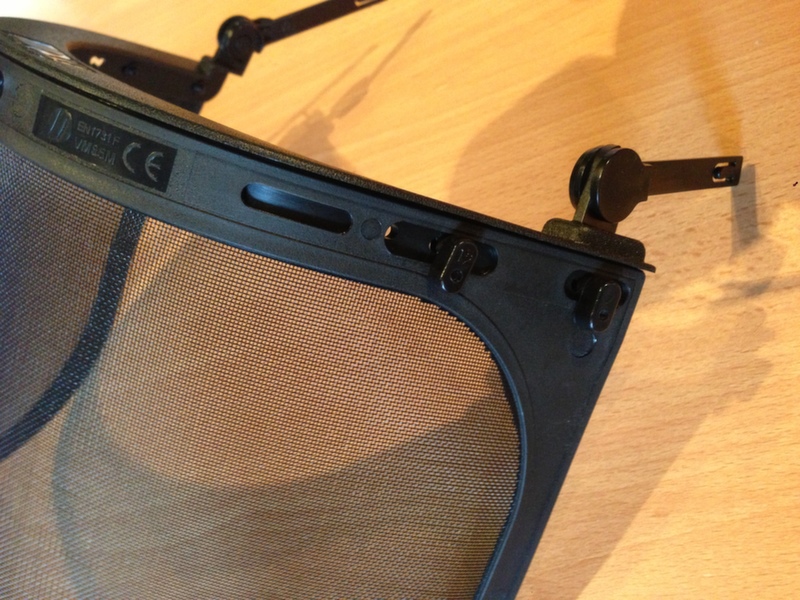
Step 6:

Now insert the legs of the visor frame into the slots on the ear defender plates. Push these through until the locating pin reaches the second slot back.

Your combi hat should now be ready to keep you safe. Please feel free to give us a call if you are having any difficulty with any of these steps and we would be happy to help.

Keep safe and have a look at some of our other chainsaw safety wear!


Back
Accessories
  • PowerSharp
  • Chainsaw Accessories
  • Chain Making Tools
  • Chainsaw Safety Wear
  • Chainsaw Oils
  • Sharpening Tools & Accessories
  • Chainsaw Chain Bulk Rolls
  • Trimmer Lines
Garden Machinery
  • Chainsaws
Brands
    • ACTIVE
    • AEG
    • Aldi
    • ALKO
    • ALPINA
    • BELL
    • BERNARD
    • BLACK & DECKER
    • BLITZ
    • BOSCH
    • BULLCRAFT
    • CAMPAGNOLA
    • View All Brands
© Premium Sawchain
  • 160 Moira Road,
    Glenavy,
    Crumlin,
    BT29 4LR,
    County Antrim,
    United Kingdom
  • Tel: 028 9433 4444
  • Email: info@premiumsawchain.co.uk
  • Web Design Northern Ireland by
    Kyber Ditigal LTD
  • Site Map
Stay In Touch...
  • © Copyright Premium Sawchain
  • Blog
  • Terms & conditions
  • Privacy Policy
  • Site Map